
TexasPrick.org · Step-by-Step Guide

How to Reconstitute
& Inject Peptides

From powder to injectable — the complete protocol. Supplies, mixing, dosing math, sites, sterile technique, and the red flags that mean stop.

What You'll Need

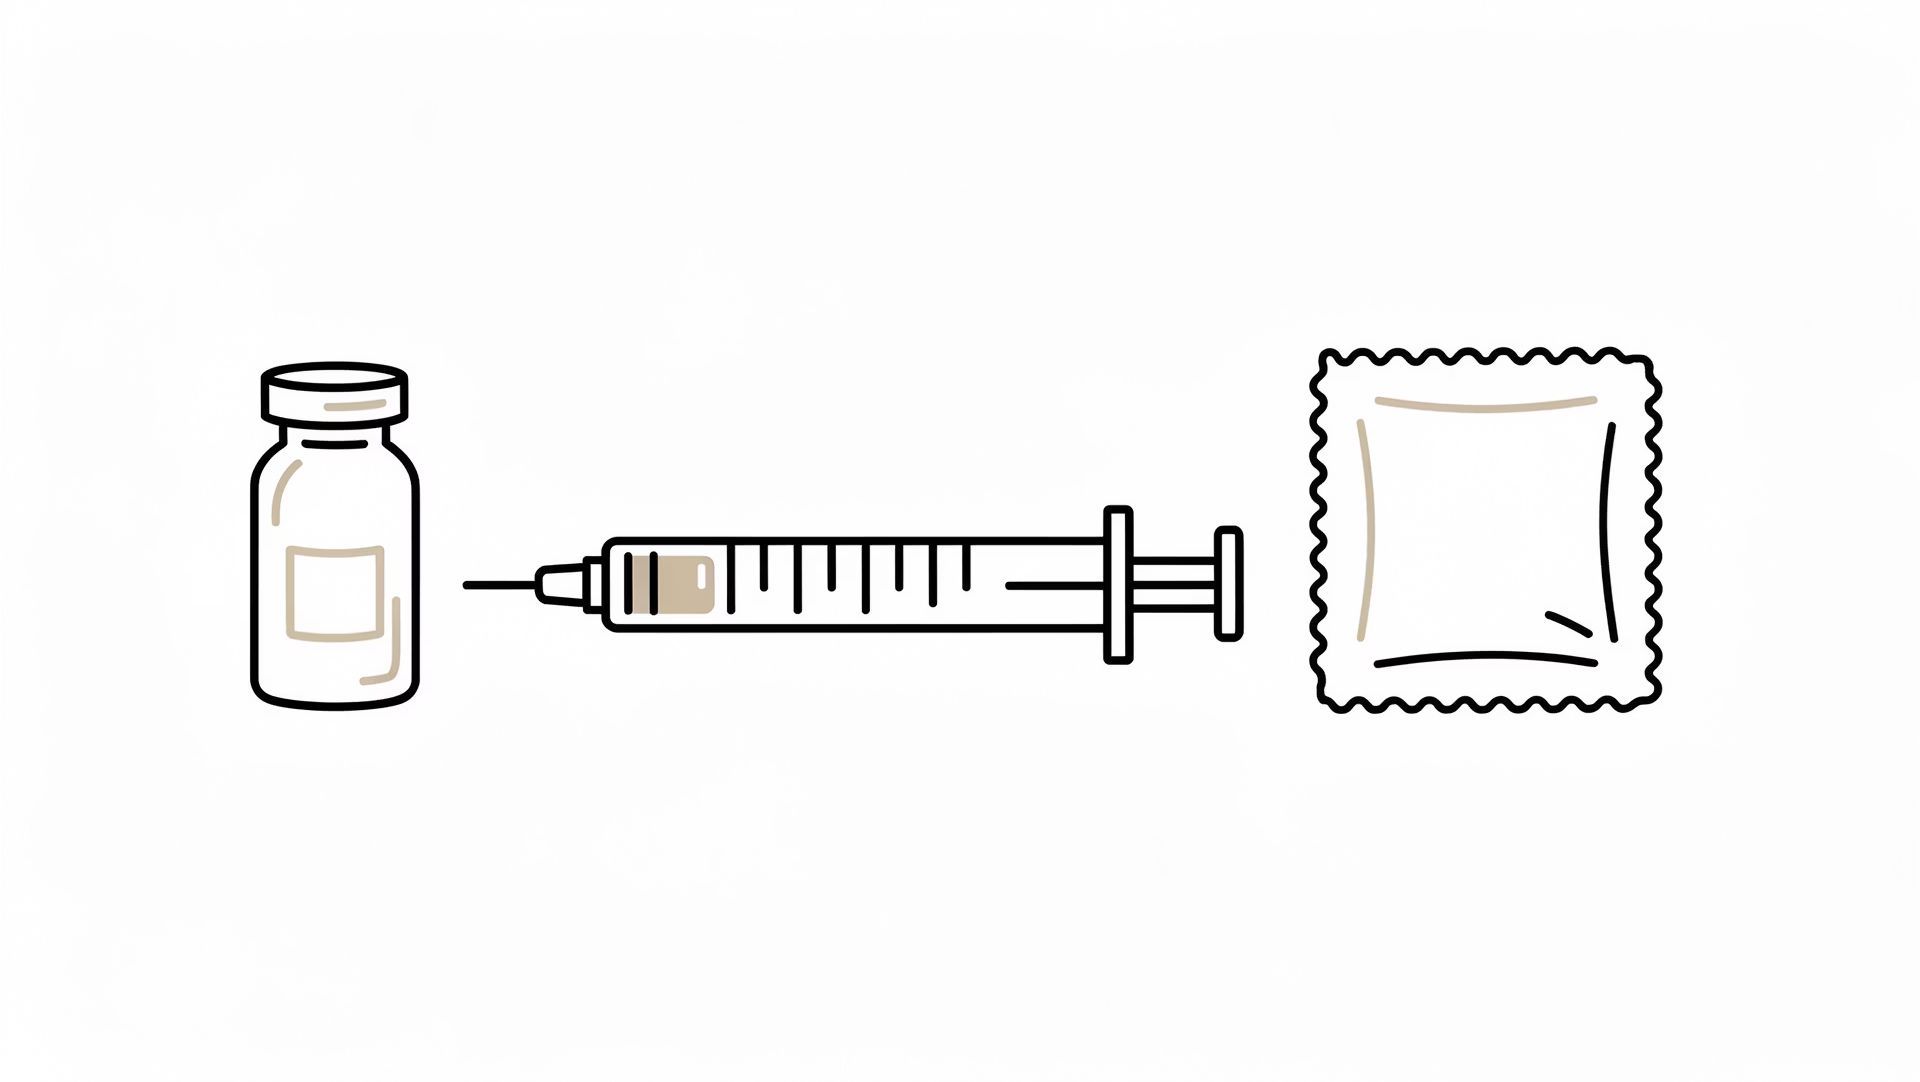
Gather your kit first

Everything within reach on a clean, flat surface before you start.

Lyophilized Peptide Vial

Your freeze-dried peptide powder. Keep refrigerated and away from UV light until ready to use.

Bacteriostatic Water (BAC)

Sterile water with benzyl alcohol to prevent bacterial growth. Do not substitute tap water, plain saline, or plain sterile water for multi-use vials.

Insulin Syringe (1 mL, 29–31g)

Standard insulin-style syringe for drawing and injecting. Short needle for SubQ; longer for IM.

Alcohol Swabs

For wiping vial stoppers before every draw and cleaning the injection site.

Sharps Container

For safe needle disposal. Never recap and toss in regular trash.

Foil or Dark Storage

To protect reconstituted vials from light degradation.

Step 1

Reconstitution — mixing the peptide

Turning dry powder into an injectable solution, without degrading it.

1

Gather Your Supplies

Peptide vial, BAC water vial, insulin syringe, and alcohol swabs. Work on a clean, flat surface.

2

Wipe Both Vial Stoppers

Use a fresh alcohol swab on the stopper of both the peptide vial and the BAC water vial. Let them air dry for 10–15 seconds.

3

Draw the BAC Water

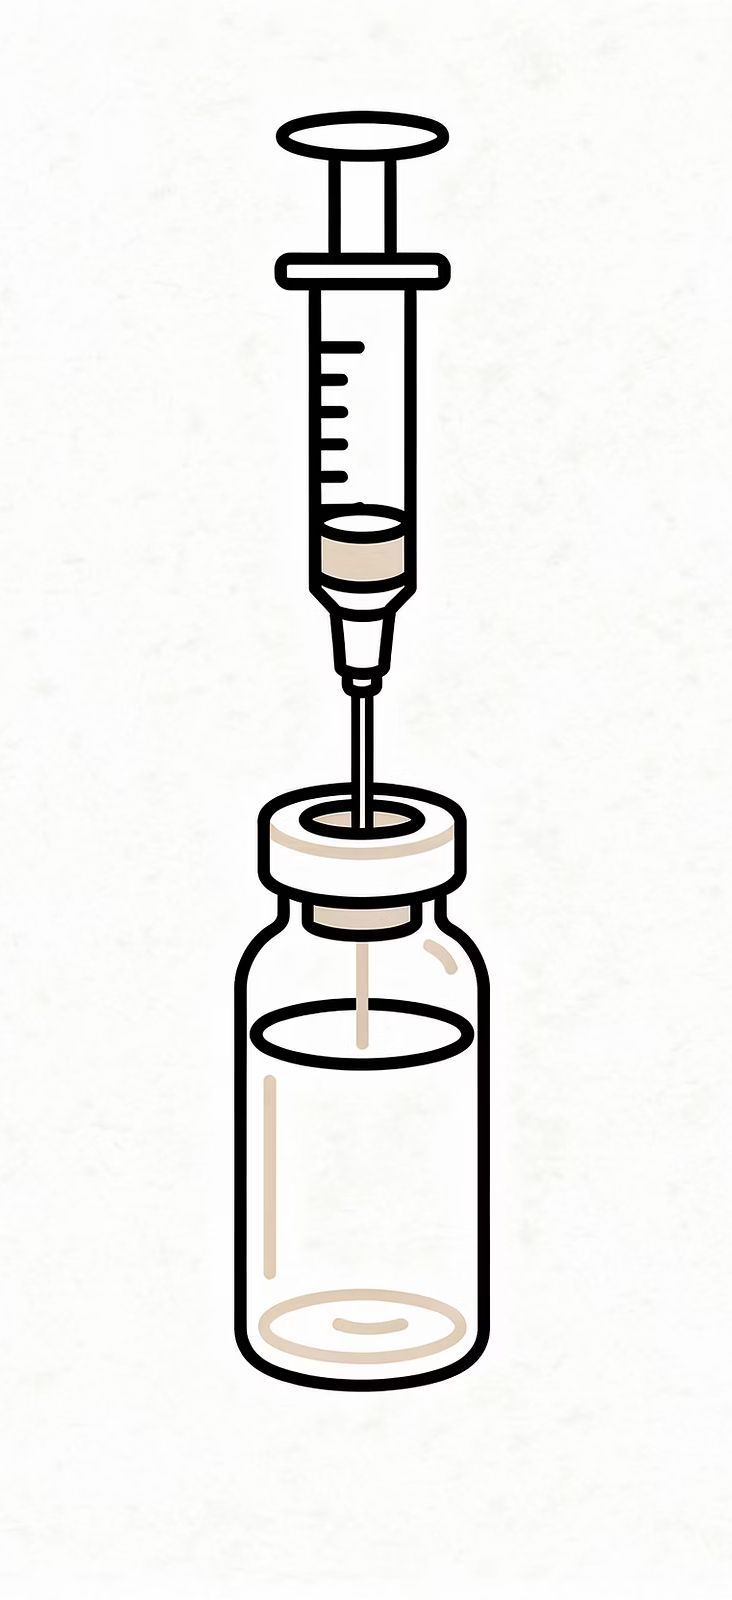
Insert the syringe needle into the BAC water vial. Draw 1–2 mL — the exact amount determines your concentration (see dosing math below).

4

Inject Slowly Down the Wall

Insert the needle into the peptide vial and angle it so the BAC water runs slowly down the inside wall — do not shoot it directly onto the powder. This prevents foaming and degradation.

5

Do Not Shake

Gently swirl the vial in a slow circular motion until fully dissolved. The solution should be clear. If it's cloudy or has particles, do not use it.

6

Label and Store

Write the date on the vial. Refrigerate immediately. Keep away from light — wrap in foil or a dark container. Do not freeze.

Dosing math example

5 mg peptide vial + 2 mL BAC water = 2,500 mcg per mL. A 100 mcg dose = 0.04 mL = 4 units on an insulin syringe.

Step 2 — Loading the Syringe

1

Remove the Vial From the Fridge

Let it sit 1–2 minutes to reach room temperature. Cold liquid can cause minor stinging on injection.

2

Wipe the Stopper

Use a fresh alcohol swab on the vial stopper. Let it air dry.

3

Draw Air First (Optional)

Pull the plunger to draw air equal to your dose, then inject that air into the vial before drawing — this creates positive pressure and makes drawing easier.

4

Draw Your Dose

Insert the needle, invert the vial, and slowly pull to your target volume. Go slightly past, then push back to the exact mark to remove air.

5

Tap Out Air Bubbles

Hold the syringe needle-up and tap the barrel. Push gently until any air is expelled and a small drop appears at the tip.

6

You're Ready

Cap carefully if not injecting immediately. Inject within a few minutes of drawing.

Step 3

Choosing your injection site

Where to inject, by experience level and method.

SubQ · Best for beginners

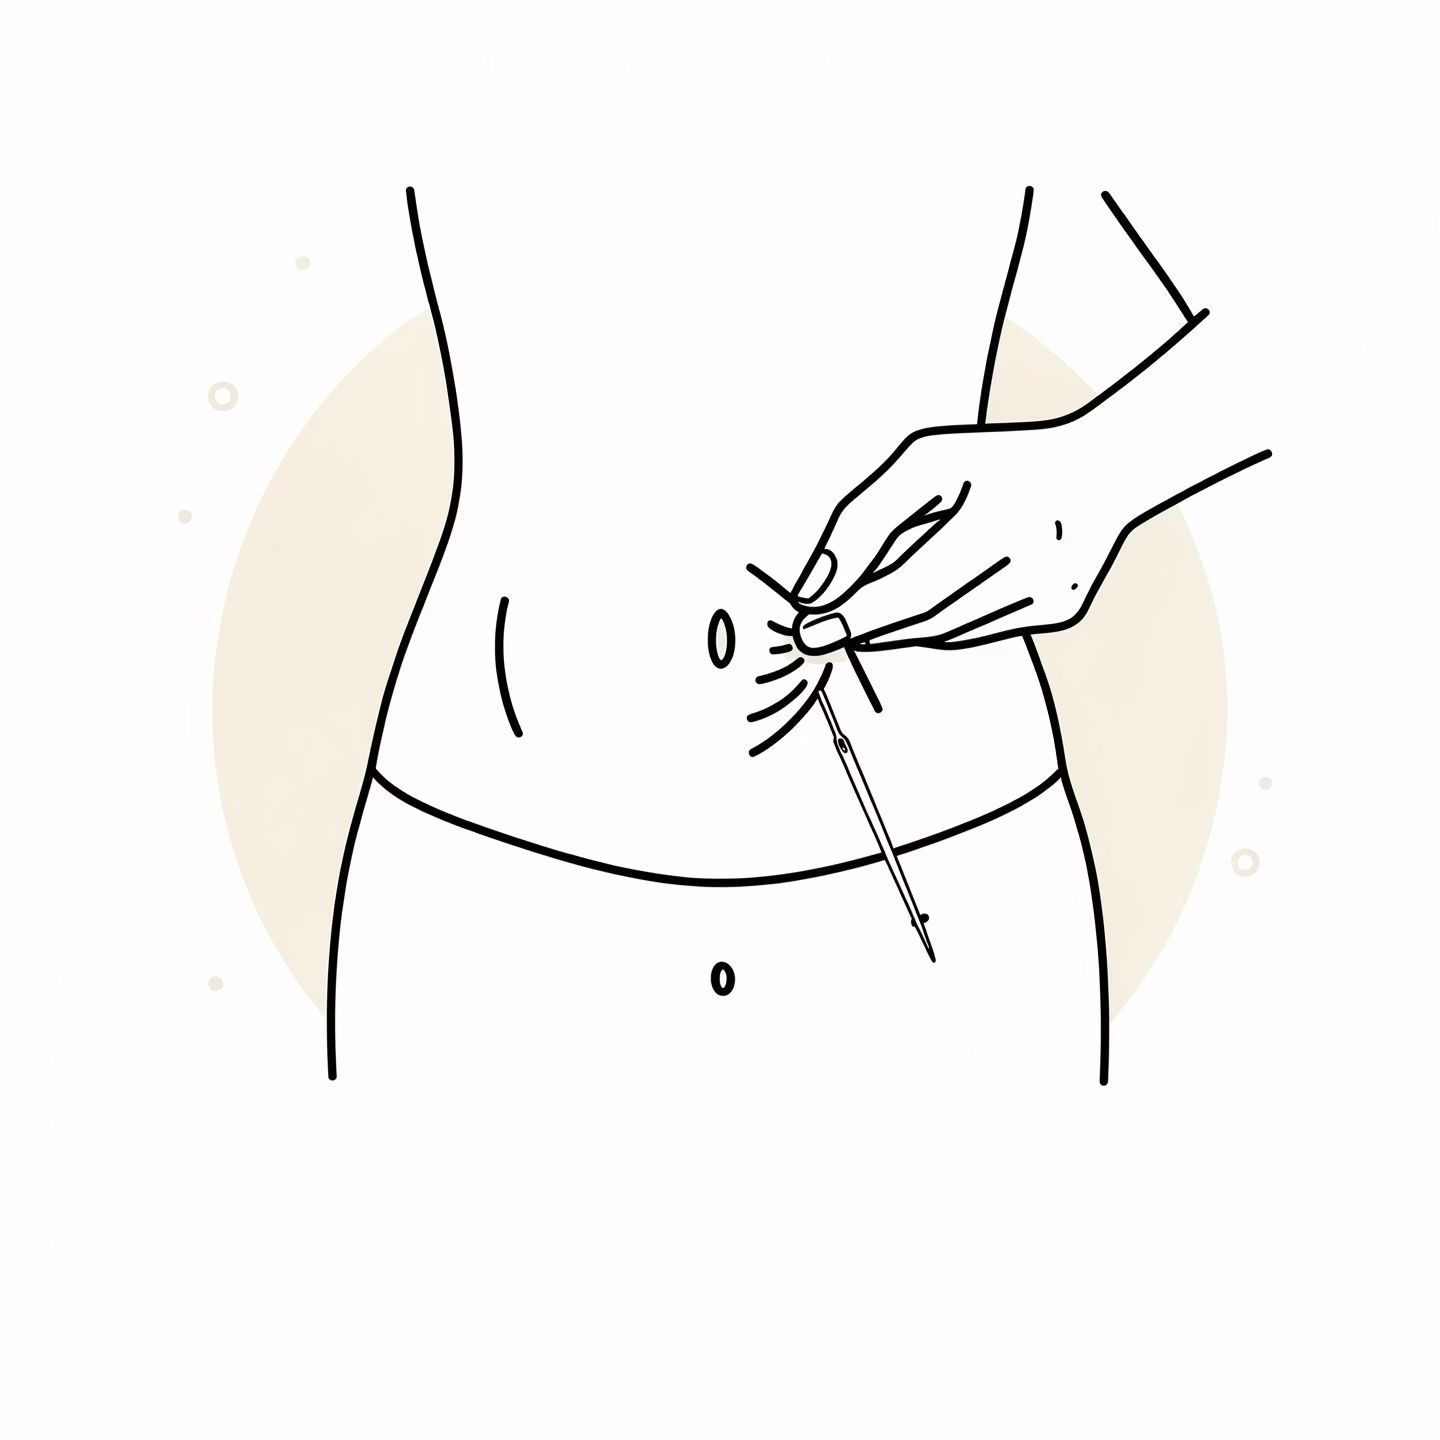
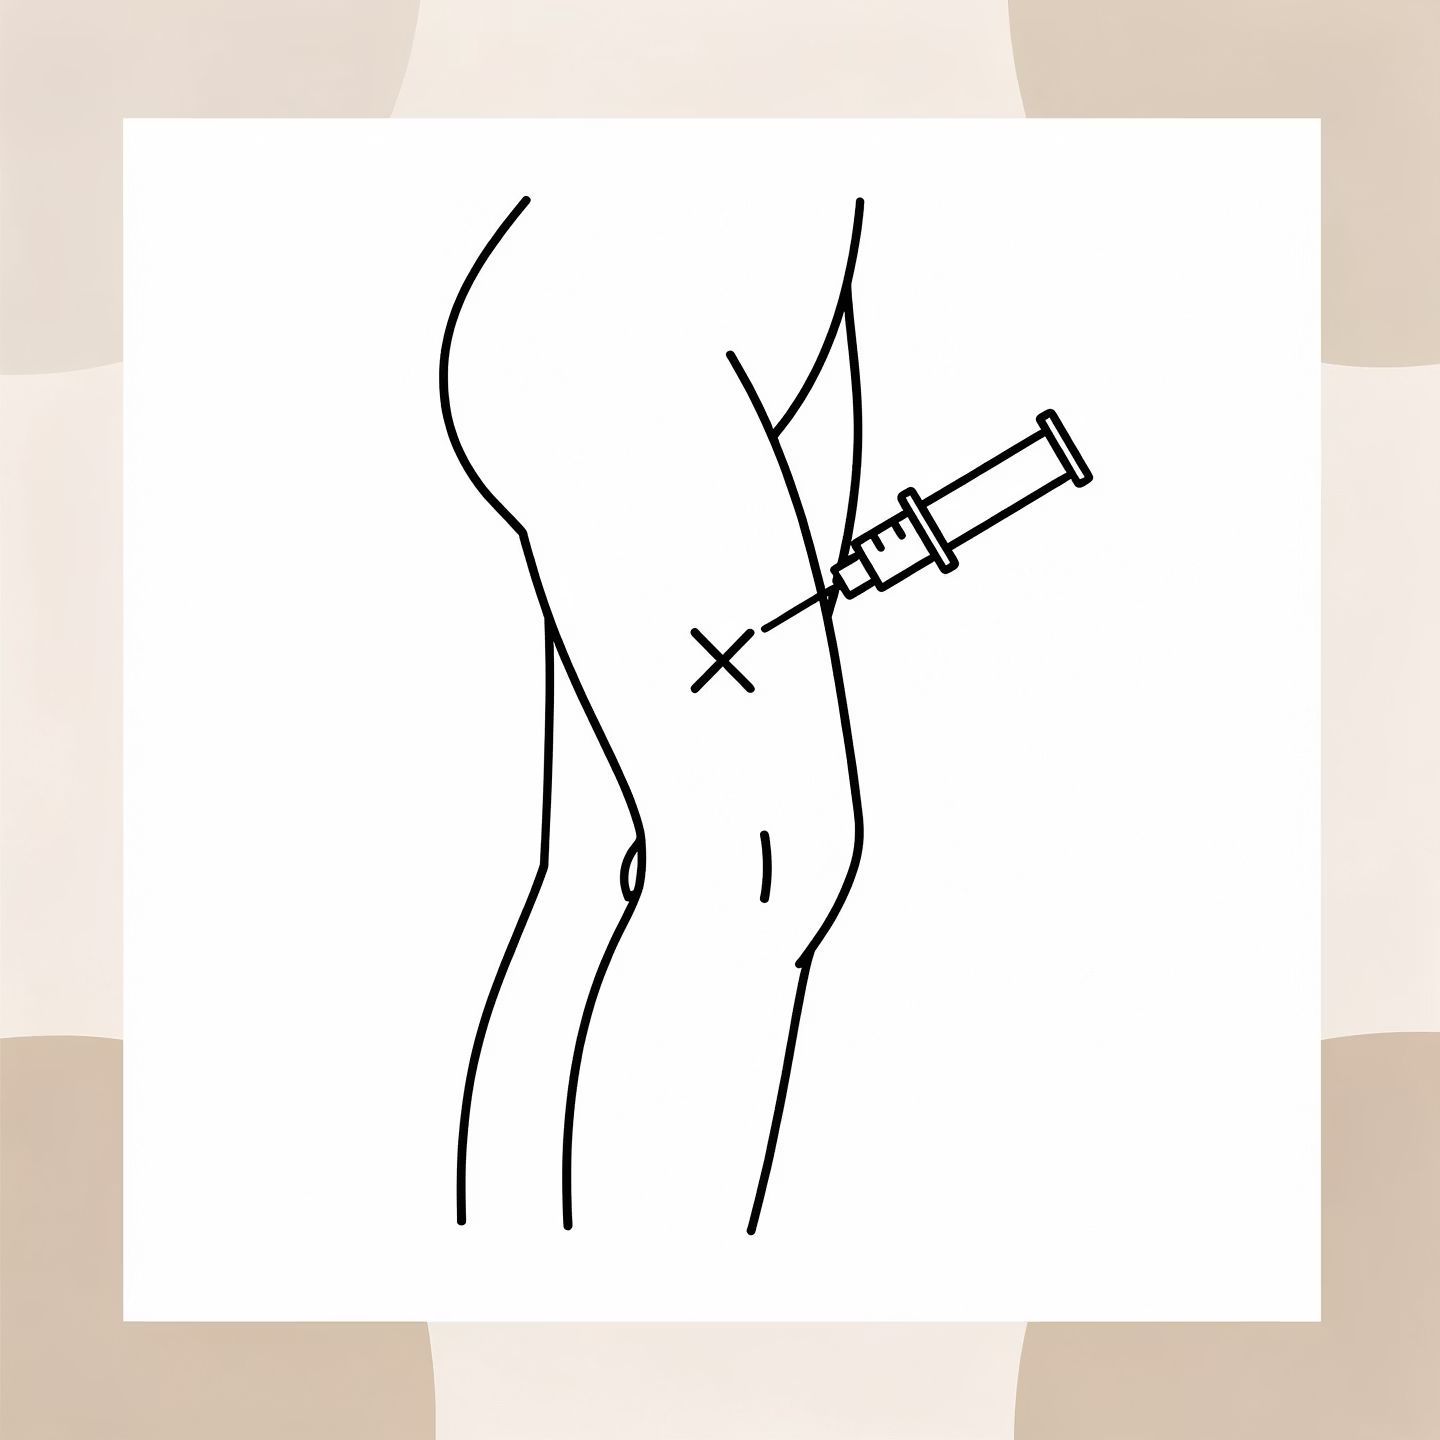
Abdomen

  • Pinch 2 inches from the belly button
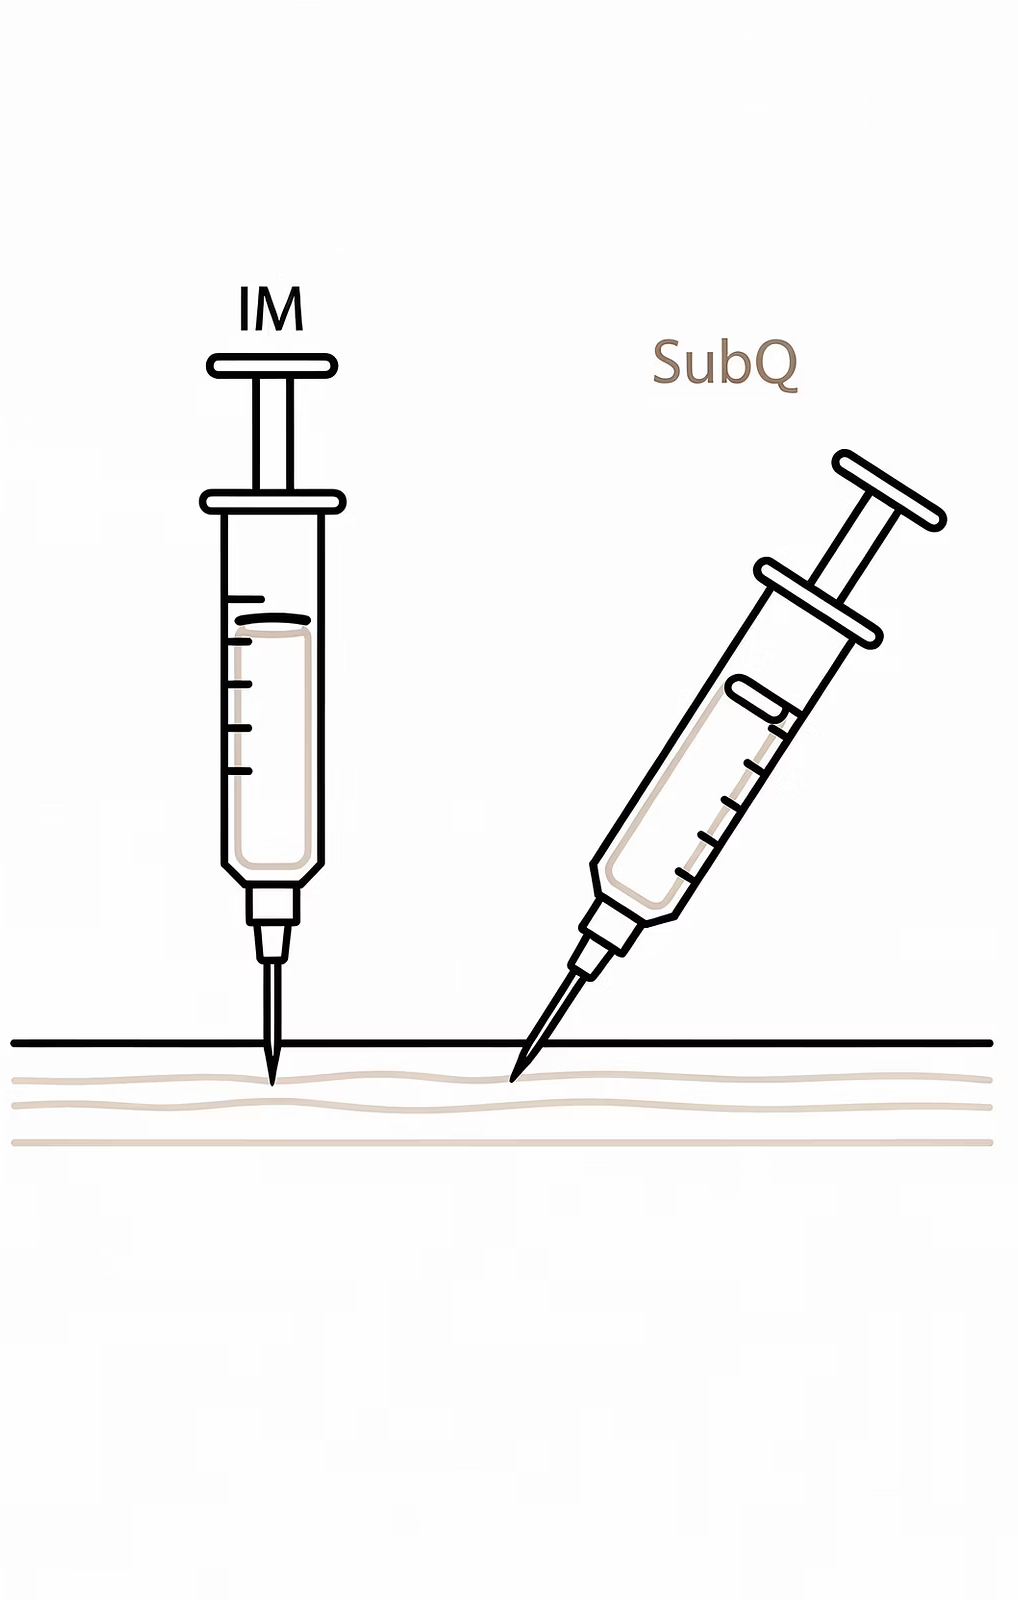
  • 45° angle into the fold
  • Slow absorption, very forgiving
IM · Best first IM site

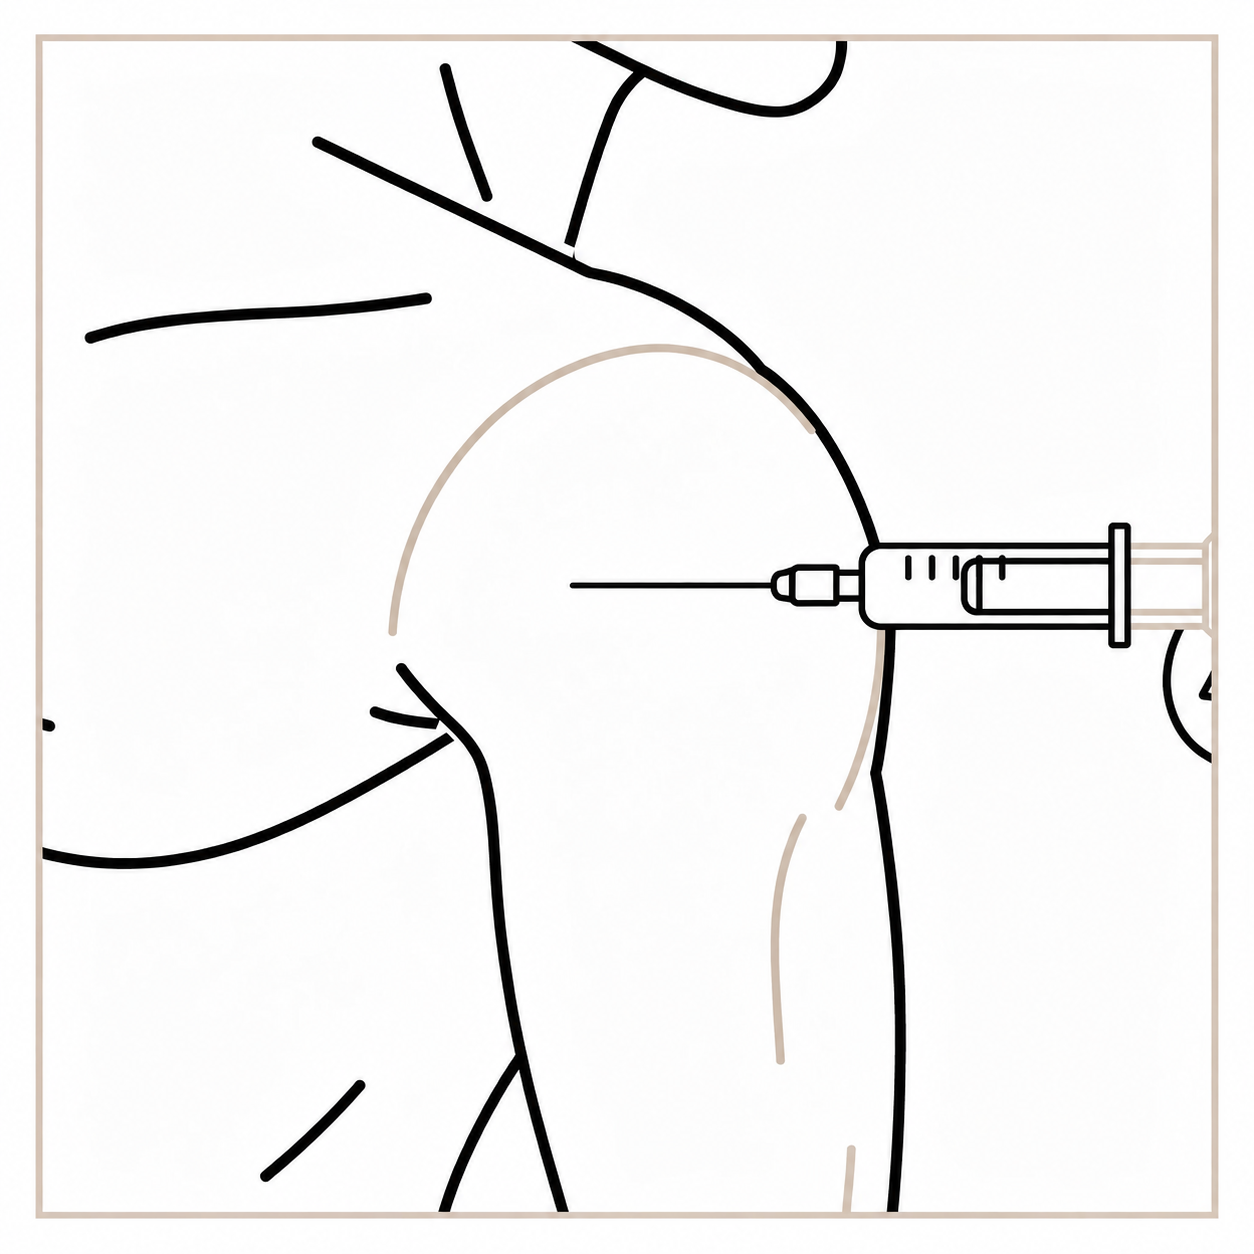
Side Delt

  • Easy to self-inject, no flexibility needed
  • 90° angle, relax the arm
  • Faster absorption than SubQ
IM · Once comfortable

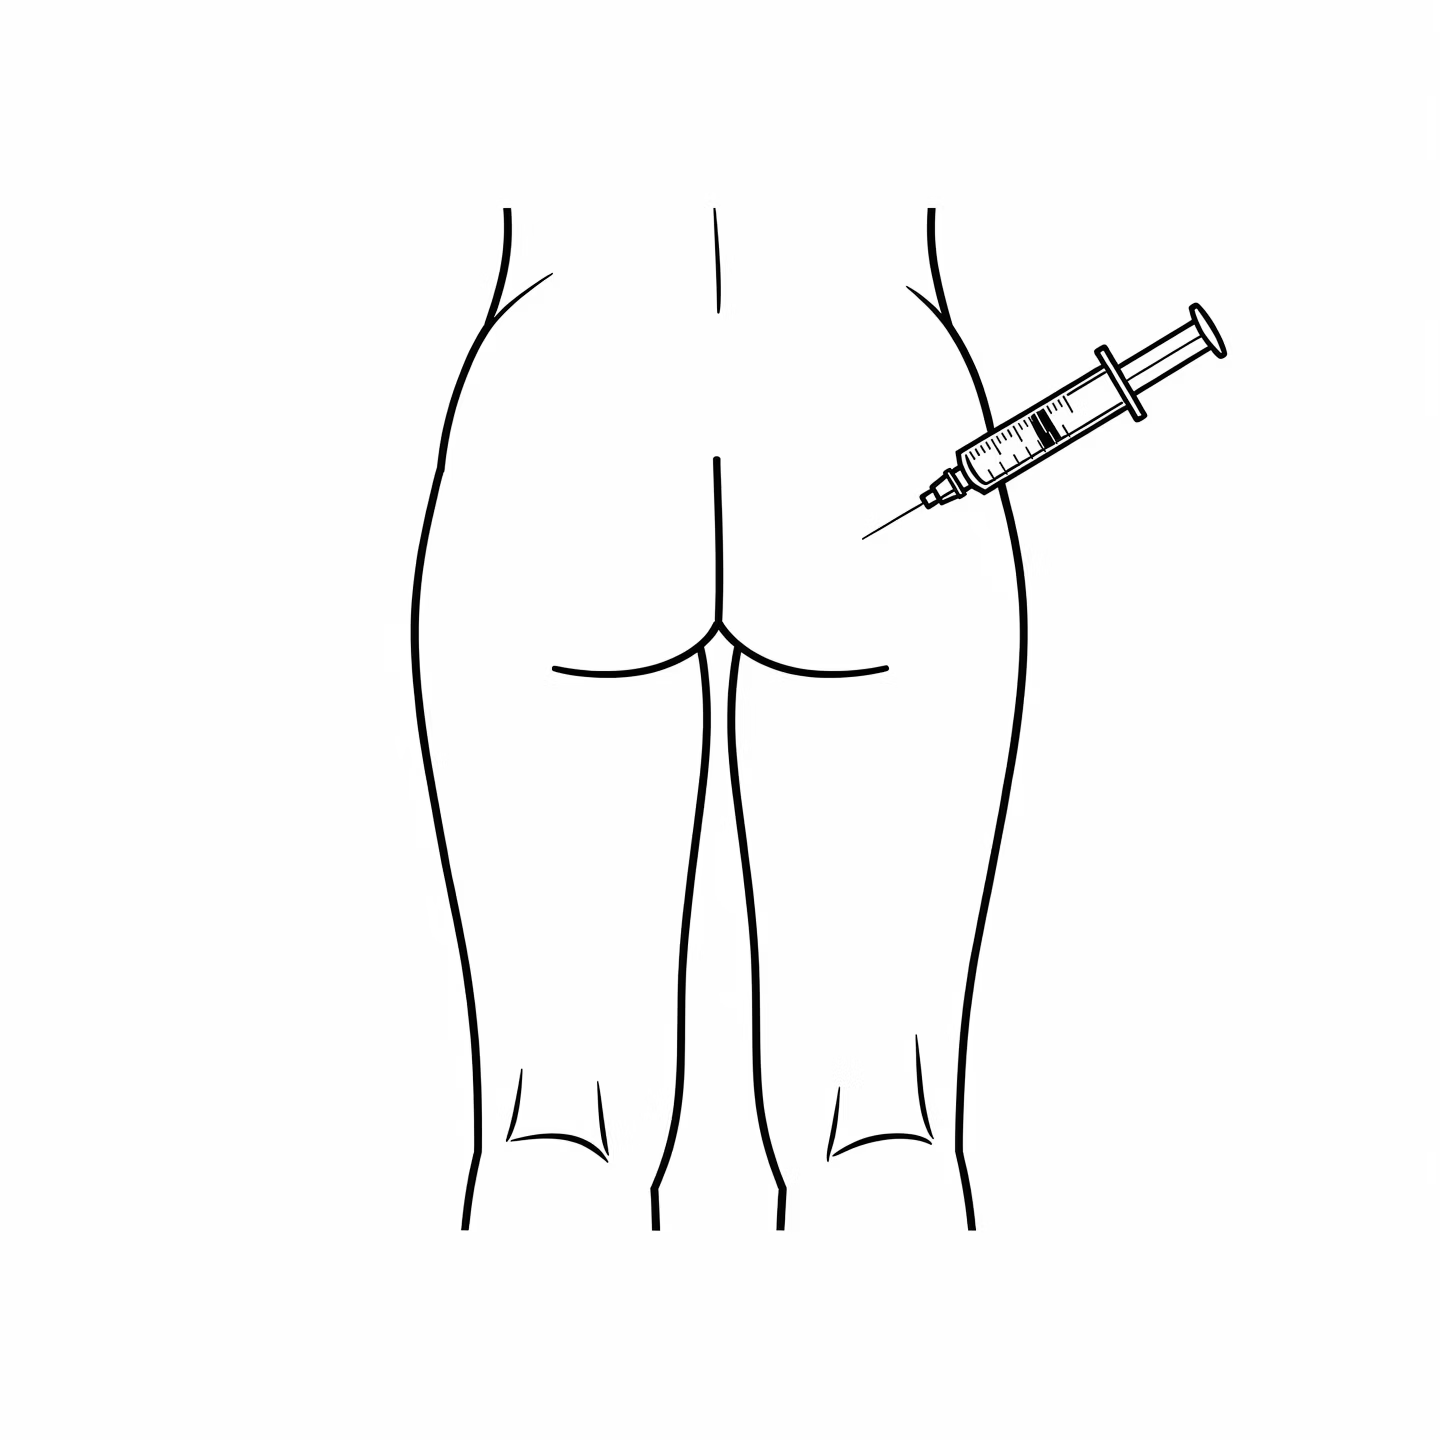
Upper Outer Glute

  • Upper outer quadrant ONLY
  • 90° angle, stand and relax
  • Requires flexibility to reach solo
IM · Easy self-inject

Outer Thigh

  • Middle third of the outer thigh
  • 90° angle, seated or standing
  • Good alternative to the delt

Our preference: IM for daily protocols; SubQ abdomen is the recommended starting point for beginners. Always inject into the upper outer quadrant of the glute — not the center or lower portion. Avoid the sciatic-nerve zone.

Step 4 — The Injection (Technique)

Glute or Delt (IM)

  • Relax the muscle completely — don't flex
  • Clean the site with an alcohol swab, let it air dry
  • Insert straight in at 90° — smooth and confident; hesitation causes more pain
  • Inject slowly and steadily — don't rush the plunger
  • Withdraw at the same angle
  • Apply light pressure with a clean swab — do not rub

Abdomen (SubQ)

  • Pick a spot 2 inches from the belly button
  • Pinch the skin and fat — lift it up and hold
  • Insert at 45° into the pinched fold
  • Inject slowly and steadily
  • Withdraw, release the pinched skin
  • Apply light pressure — do not rub

Needle reuse: Studies on insulin users show reusing needles is acceptable for the same person when not contaminated. Replace approximately once per week or sooner if it feels dull. Never share needles.

Sterile Technique

Why it matters — and how to keep it

The moment a needle touches anything but a sterile vial or your cleaned site, it's no longer sterile. One contaminated injection can cause a serious abscess or infection.

Never Touch the Needle

Do not touch the shaft or tip with fingers, clothing, or any surface. If you accidentally touch it — replace it. No exceptions.

Cap Protocol

Keep it capped until the moment of injection. Recap with the one-hand scoop method — set the cap on a flat surface and scoop it onto the needle. Never recap holding the cap in your fingers.

One Needle, One Use — Or Know the Rules

Ideally fresh for every injection. If reusing (same person only, never shared), inspect the tip; a dull or bent needle causes more tissue damage. Replace at minimum once per week.

Swab Everything, Every Time

Wipe the vial stopper before every draw and the site before every injection. Let both air dry — wet alcohol stings and slightly compromises the sterile field.

Work Clean

Clean, flat surface. Wash hands before handling supplies. Don't sneeze or cough over open vials or uncapped needles. Keep your kit closed when not in use.

Make It Automatic

Sterile technique isn't paranoia — it's making contamination impossible by default. Build the habit once and it becomes automatic.

Peptide Calculator

Mix so 5 ticks = one dose

Mix your peptide so a standard, easy-to-measure amount on the syringe equals your daily dose. Every draw stays consistent, fast, and foolproof.

The Standard Mix Method

  • An insulin syringe has 100 units per mL
  • 5 ticks = 5 units = 0.05 mL
  • Make your daily dose equal 0.05 mL of your reconstituted solution
  • Work backwards: dose (mcg) ÷ 0.05 = concentration (mcg/mL); add that much BAC water

Worked Example

5 mg (5,000 mcg) vial, daily dose = 250 mcg:

250 mcg ÷ 0.05 mL = 5,000 mcg/mL → add exactly 1 mL BAC water → 5 ticks = 250 mcg every time ✓

Once you dial in your ratio, write it on the vial with a marker. If your dose changes, remix a new vial rather than adjusting on the fly.

Why this works: eliminates math at every draw, reduces dosing errors, and keeps all your peptides on the same system. Verify your mix with a peptide reconstitution calculator before mixing.

Storage & Quick Reference

Dark, cold, stable

Storage Rules

  • Dry powder: refrigerate, away from UV light and heat
  • Reconstituted: refrigerate immediately after mixing
  • Do NOT freeze reconstituted vials
  • Wrap in foil or a dark container
  • Discard reconstituted vials after 4–6 weeks
  • Dry powder is usually stable for months refrigerated

Physical Storage / Case

  • Hard case, pouch, or opaque container — light degrades peptides
  • A pill case, travel case, or any dark container works
  • Never leave vials on a counter, windowsill, or in ambient light
  • Traveling: small insulated case with an ice pack — do not let them freeze

Every-Use Checklist

  • Swab the stopper before every draw
  • Clean syringe for every injection
  • Let the site air dry after swabbing
  • Rotate sites every session
  • Inject slowly — never rush the plunger
  • Dispose of needles in a sharps container
  • Log your site and dose

Red Flags — Stop & Reassess

Cloudy or particulate solution (do not inject) · a vial left unrefrigerated too long (discard) · redness, swelling, or warmth beyond 24 hours · fever after injection · severe or unusual pain at the site. If you see signs of infection — increasing redness, warmth, swelling, pus, or fever — seek medical attention. Improper technique or contaminated product can cause serious complications.

Best Practices

The short version

Mix smart

Use the 5-tick method. Dial in your ratio once, write it on the vial, never do math again.

Stay sterile

One touch = compromised. Swap the needle, start over. No shortcuts.

Swab and dry

Alcohol swab every stopper, every site, every time. Let it dry before you inject.

Inject slowly

Never rush the plunger. Slow and steady reduces pain and tissue irritation.

Rotate sites

Same spot every day = scar tissue. Rotate every session.

Store dark and cold

Fridge, foil, case. Light and heat are the enemy — but don't freeze.

Label everything

Date on every vial. Know what's in it and when you mixed it.

Know your red flags

Cloudy solution, fever, swelling past 24 hours — stop and reassess.

Do your homework

Know the peptide, know the dose, own the decision.

The most effective prick
is a Texas Prick.

Courtesy of Texas Ember.

TexasEmber.com — Education. Coaching. Applied Knowledge.